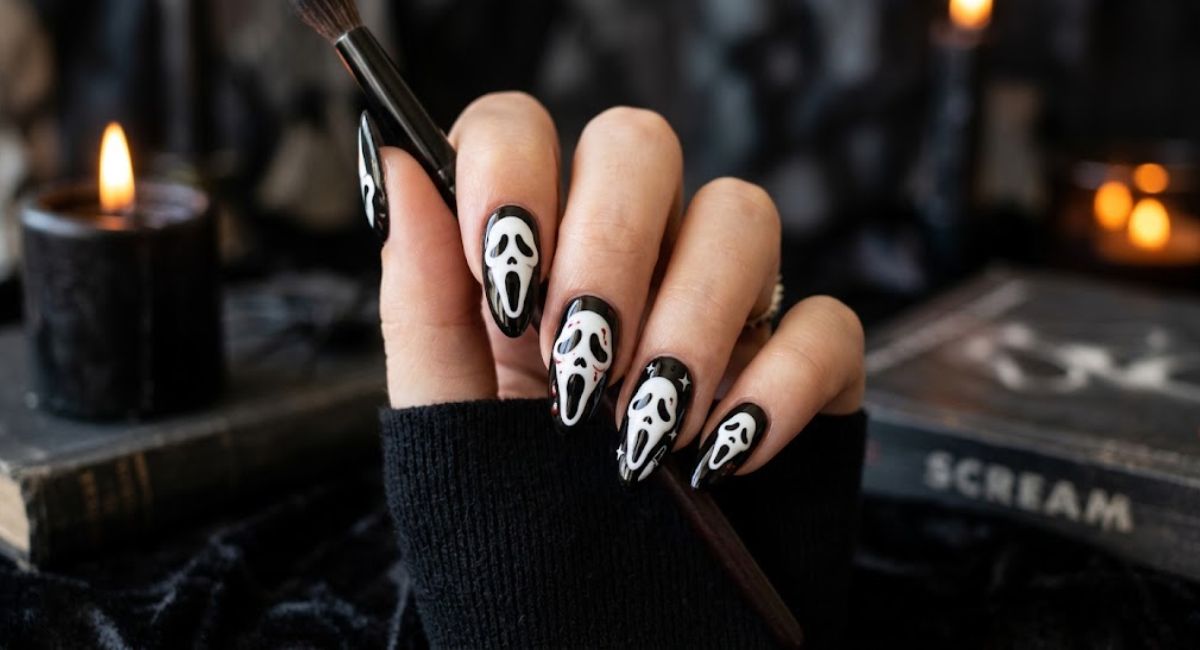
Ghost face nails are one of the boldest, most recognizable Halloween nail art trends taking over social media right now. Whether you spotted them on TikTok, Pinterest, or your favorite nail tech’s page, there is no mistaking that iconic hooded mask staring back at you from someone’s fingertips. And the best part? You do not need a professional booking to pull this look off.
This guide covers everything: design variations, a proper step-by-step tutorial, tools you actually need, color combos that work, common beginner mistakes, and ideas for wearing ghost face nails beyond just October 31.
What Are Ghost Face Nails?
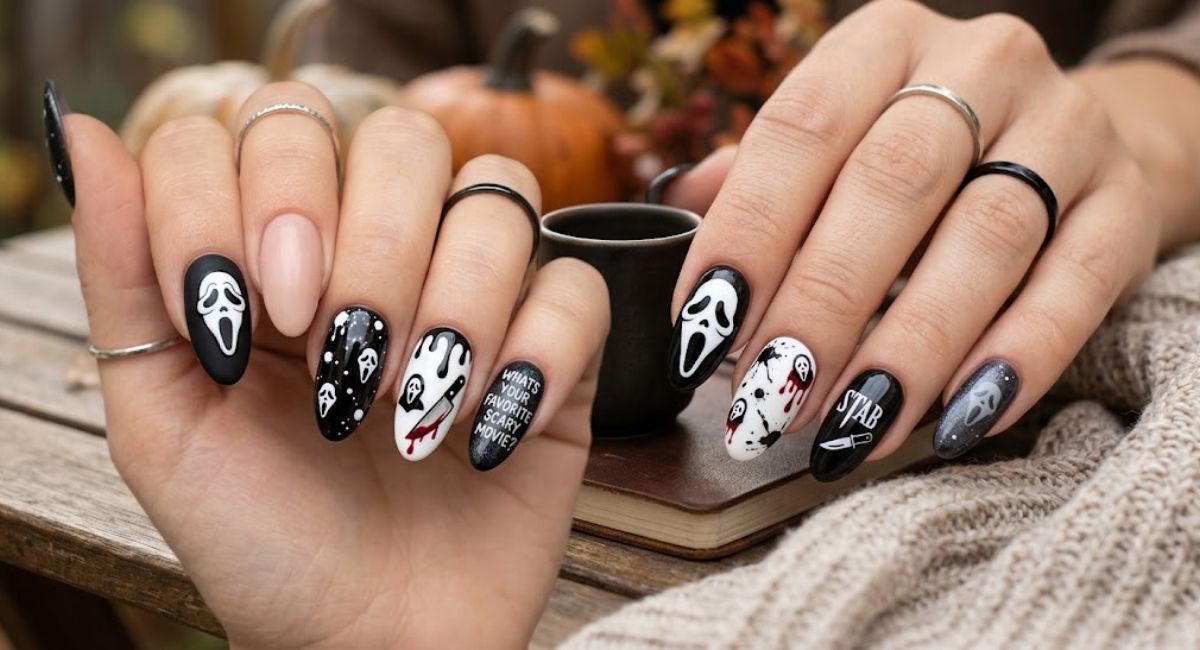
Ghost face nails are nail art designs inspired by the Ghostface killer from the Scream horror movie franchise. The character wears a flowing black robe and a white, elongated mask with large black eye sockets and a twisted, screaming mouth. That mask is what nail artists recreate, usually as an accent nail, and surround it with horror-themed details like bloody drips, black bases, or red splatter effects.
The look first exploded on TikTok around 2022 when the new Scream films released, and it has stayed popular every Halloween season since. Right now in 2026, ghost face nails are showing up in versions ranging from dark and gory to soft pink and surprisingly cute.
Why Ghost Face Nails Are Still Trending
Most Halloween nail trends fade fast. Ghost face nails have not, and there are real reasons for that.
First, the design is visually specific. Anyone who sees it immediately knows what it is, which gives the manicure instant conversation value. Second, the black and white palette is actually versatile. It pairs with almost any outfit, costume, or event. Third, artists keep finding new ways to remix the look, so it never feels stale.
Some versions skip the Ghostface mask entirely and let blood drip tips carry the whole design on their own, which makes it a strong option for anyone who wants scream-adjacent nails without committing to the full illustration. That flexibility keeps the trend accessible to beginners and satisfying for professionals alike.
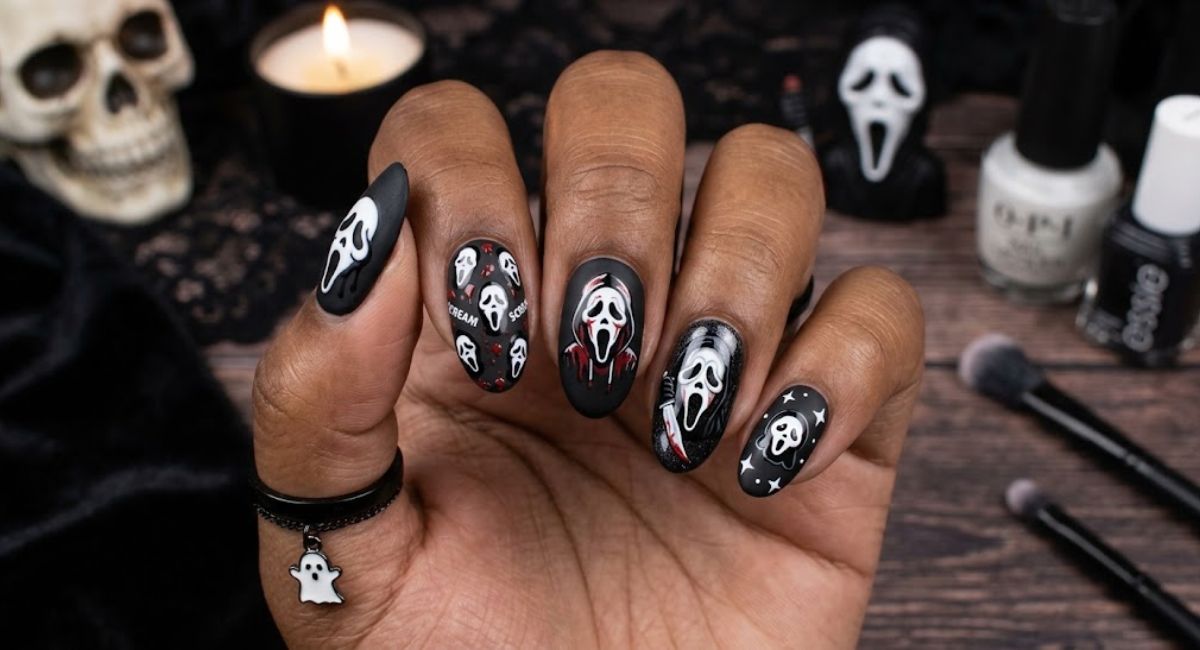
Ghost Face Nail Design Variations
There is no single way to do ghost face nails. Here are the main styles you will encounter, along with what makes each one work.
Classic Black and White Ghostface Accent
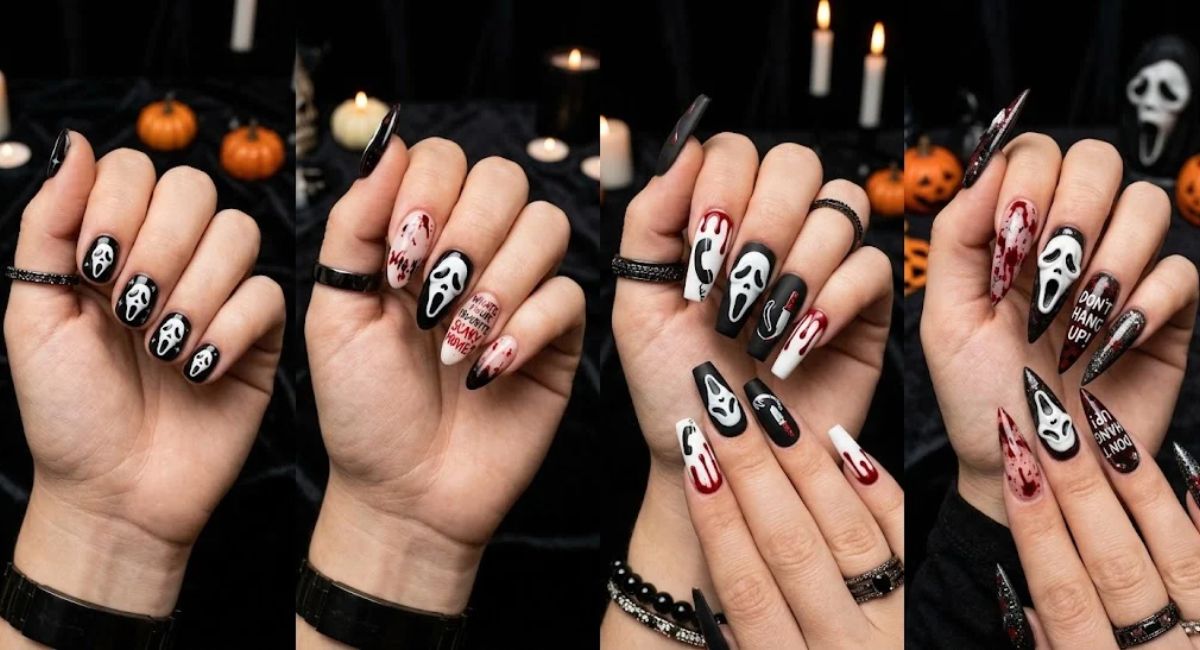
This is the original. You paint the majority of your nails in black or dark red, then dedicate one nail (usually the ring finger or middle finger) to the Ghostface mask on a white or black background. A crisp white Ghostface mask on a contrasting black background really makes it stand out, and adding subtle red accents to the mask elevates the whole look.
Bloody French Tips with Ghostface Accent
This combination became massively popular because it balances two horror elements without overwhelming the eye. For medium coffin gel nails, using a clear and white base makes the bloody details pop. The bloody French tips create a realistic red splatter effect, giving an authentically gory, horror-movie feel. The Ghostface mask goes on one accent nail, and the rest carry the blood drip design.
Pink Ghostface Nails
Yes, pink. This one surprised a lot of people but it genuinely works. Pink ghost face nail designs, including pink and black combinations on short or acrylic nails, have become a popular request. The juxtaposition of soft, feminine color with a horror icon creates something visually surprising and very shareable.
Glow-in-the-Dark Ghost Face Nails
Using glow-in-the-dark gel polish creates ghosts and horror designs that come alive in the dark, with the glow effect lasting up to two weeks before fading. For ghost face nails specifically, painting the mask details with a glow pigment over the standard white base makes the eyes and mouth light up under UV or in darkness. Perfect for a Halloween party.
Ghostface with Ghost French Tips
A softer take that blends two ghost references at once. You paint curved French tips in an irregular, wavy style to resemble ghostly shapes, then use black polish or a nail art pen to draw two small eyes and a little O shape for the mouth on each ghost tip. Pair one of these nails with a full Ghostface mask accent for a cohesive horror theme that still reads as polished.
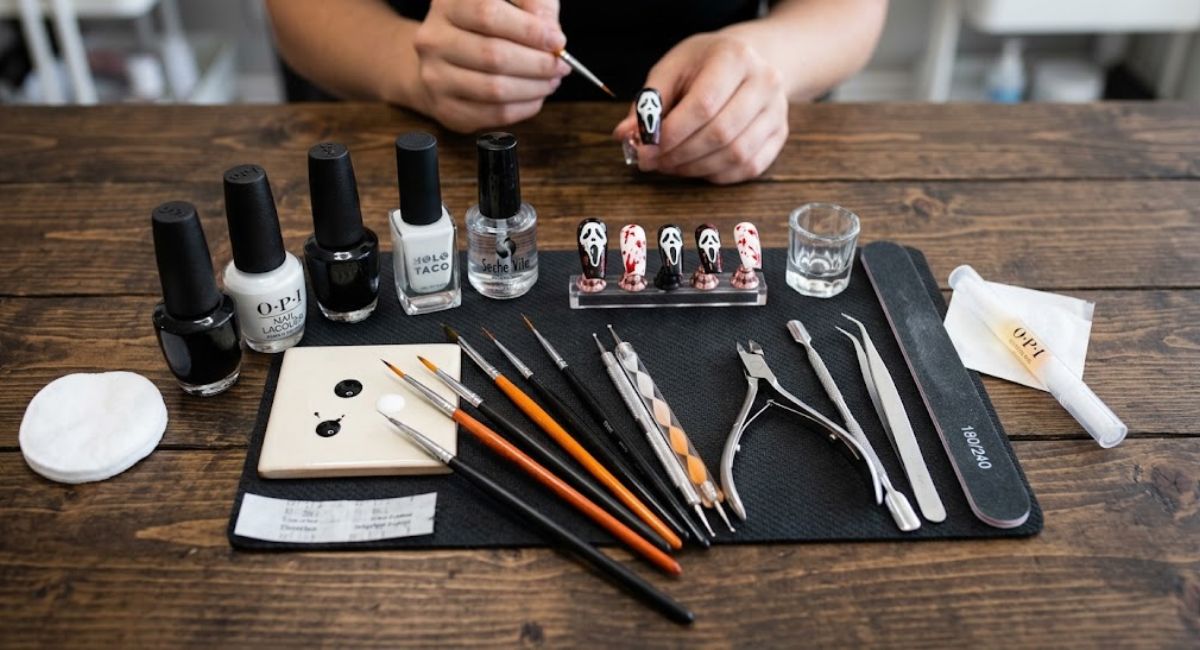
Tools You Need for Ghost Face Nails
You do not need an entire professional kit. These are the tools that actually matter.
For Freehand Ghost Face Nails:
- A fine detail liner brush (the most important tool)
- A dotting tool for the eye sockets
- Black and white gel polish or regular nail polish
- Red polish for blood details
- A topcoat
For Stamping (Beginner Friendly):
- A stamping plate with a Ghostface or skull design
- Stamping polish (thicker than regular polish, transfers more cleanly)
- A stamper and scraper tool
Nail Shapes That Work Best:
- Coffin nails give the most canvas space for detailed art
- Stiletto nails add drama to the ghost face silhouette
- Short square nails work well if you simplify the design to just the mask outline
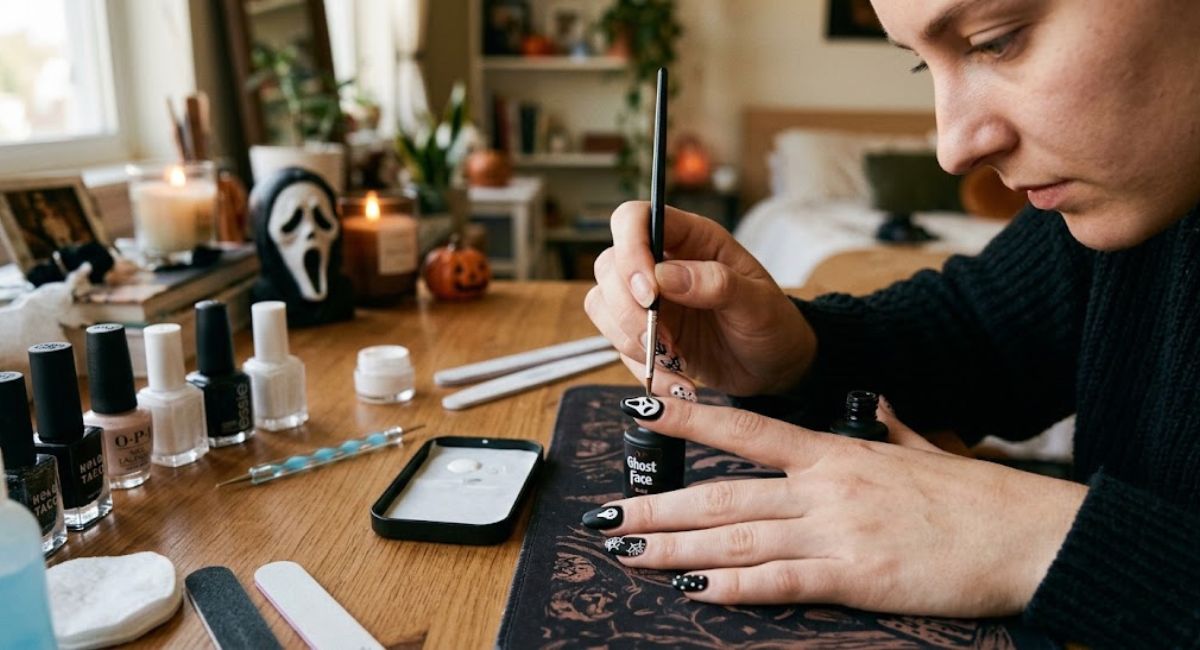
Step-by-Step: How to Do Ghost Face Nails at Home
This tutorial is for the classic Ghostface accent nail on a black base. It is beginner friendly but produces a professional result when done carefully.
Step 1: Prep Your Nails Properly
Nail prep is key. Start with clean, prepped nails. File your preferred shape, buff the surface lightly, push back your cuticles, and apply a base coat. Skipping this step is the most common reason nail art peels early.
Step 2: Apply Your Base Color
Paint all nails except your accent nail in black. Two thin coats work better than one thick one. Let each coat dry fully before adding the next.
For your accent nail, apply two coats of white polish. This will be the canvas for the Ghostface mask.
Step 3: Sketch the Mask Shape
Using a dotting tool or the tip of a toothpick, lightly sketch the outline of the Ghostface mask in black. The mask has a teardrop or oval shape with a flowing hood at the top. Keep the shape simple at first. You can refine it with your liner brush.
Step 4: Fill and Define
Use your black liner brush to carefully outline the mask shape, then add the defining details: the large oval eye sockets, the wide twisted mouth opening, and the hood that drapes over the top and sides of the face. The eyes do not need to be perfectly symmetrical. Slight imperfections actually make the mask look more hand-crafted and intentional.
Step 5: Add Blood Details
This step is optional but highly recommended. You can achieve a blood splatter effect by dabbing a small brush or toothpick with red polish onto the tips and gently blowing on it, or using a dotting tool for controlled drips. A few drops falling from the mask or along the white nail base adds the horror-movie detail that makes the design complete.
Step 6: Seal with Topcoat
Finish the look by applying a generous layer of topcoat to protect your design and give it a smooth, glossy finish. This also makes the design last longer. For gel nails, cure under your lamp after topcoat application.
Ghost Face Nails Color Combinations That Work
The classic black and white is foolproof, but these combinations also produce great results.
Black, White, and Red: The most cinematic version. Red blood details against black and white looks exactly like a Scream movie poster.
Black, White, and Pink: Goes viral every year for a reason. The softness of pink against the horror icon creates instant visual tension.
Dark Purple and White: Slightly gothic, slightly witchy. Works well if you want ghost face nails that feel more costume-adjacent than straight horror.
Clear or Nude Base with White Ghostface: A subtle take that keeps the mask detail but tones down the intensity. Great for workplaces that allow minimal Halloween nail art.
Mistakes to Avoid When Doing Ghost Face Nails
A few common errors show up repeatedly, especially with first attempts.
Using too much polish on your liner brush. Overloaded brushes create blobs, not crisp lines. Wipe most of the product off before drawing any detail.
Skipping the white base on the accent nail. If you draw the white mask directly over black without a white base coat underneath, the mask will look grey and washed out rather than stark and bold.
Rushing the dry time between layers. Every coat needs to be fully dry before adding the next. Impatience causes smearing, especially on the red blood details over white.
Making the eyes too small. The Ghostface mask’s most recognizable feature is those oversized, dramatic eye sockets. When you downscale them too much, the mask loses its character.
Ghost Face Nails for Different Nail Lengths
Short nails can absolutely carry ghost face art. The easiest version starts with a stamping plate carrying a pre-etched Ghostface design. Paint your base color, stamp the image onto one accent nail using black polish over a white transfer, seal with top coat, and you are done. No steady hand required, no fine liner, no risk of smudging.
For longer nails, the design can afford more complexity: a detailed mask with shadow shading, multiple accent nails carrying different horror elements, or a full set where each nail tells part of a horror story.
Where to Wear Ghost Face Nails
Ghost face nails work beyond just trick-or-treating night. They are a strong choice for:
- Halloween costume parties (especially if your costume is horror-themed or even deliberately unrelated)
- Scream movie marathons with friends
- Horror convention attendance
- October birthday celebrations
- Casual fall outings if you lean into the aesthetic year-round
The black and white palette means these nails actually pair with a wide range of everyday outfits. Many people wear them through the entire month of October without a second thought.
Ghost Face Nails at the Salon vs. DIY
Both routes are valid. Here is how to choose.
Go to a salon if you want the full coffin or stiletto shape built out with extensions, or if the freehand detail feels genuinely out of reach. When booking, bring reference photos of the exact mask style you want. Make sure to show your nail artist reference photos of the mask’s iconic shape so there is no ambiguity about proportions or detail level.
DIY if you are comfortable with basic nail art, own a fine liner brush, and want the creative process to be part of the fun. Stamping plates make the DIY route much more accessible even for complete beginners.
Frequently Asked Questions
1. What are ghost face nails?
Ghost face nails are Halloween nail art designs inspired by the Ghostface killer from the Scream movie franchise, featuring the character’s iconic white mask with dark eye sockets and twisted mouth.
2. Can beginners do ghost face nails at home?
Yes. Using a nail stamping plate with a pre-etched Ghostface design is the easiest beginner method, requiring no freehand skill and taking about 15 to 20 minutes.
3. What nail shape is best for ghost face nail art?
Coffin and stiletto shapes offer the most canvas space for detailed art, but short square nails work well with a simplified design focused on one accent nail.
4. How do you make the Ghostface mask look realistic on nails?
Keep the eye sockets large and dramatic, use a stark white base coat before drawing the mask over black, and add fine black outlines with a liner brush for definition.
5. What polish colors do you need for ghost face nails?
At minimum, black, white, and red. A fine detail liner brush is more important than any specific brand of polish.
6. Do ghost face nails work on short nails?
Completely. A single stamped accent nail on one finger reads instantly as Ghostface and requires no nail length.
7. How long do ghost face nail designs last?
Gel versions sealed with a quality topcoat typically last two to three weeks. Regular polish with topcoat usually lasts one to two weeks depending on daily activity.
8. Can I get ghost face nails in pink?
Yes, and this combination is very popular. Pink and black ghost face nails create a striking visual contrast and photograph extremely well.
9. What is the difference between ghost face nails and ghost nails?
Ghost face nails specifically reference the Scream movie character. Ghost nails is a broader term that includes any nail art featuring cartoon or illustrated ghost characters, often cuter and less horror-focused.
10. Are ghost face nails only for Halloween?
Mostly, but plenty of horror enthusiasts wear them year-round. The black and white palette makes them more versatile than most seasonal designs.