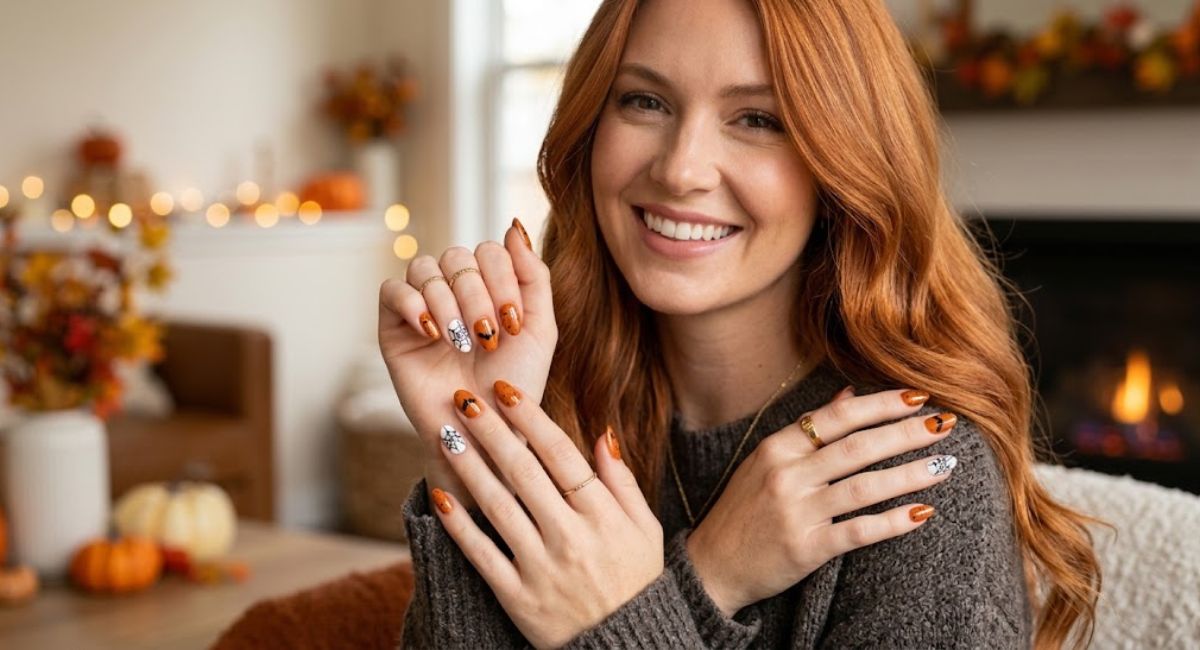
Simple Halloween nails are having a serious moment, and honestly, it makes perfect sense. Not everyone wants to spend three hours hunched over a nail brush trying to recreate a haunted mansion on their pinky finger. Sometimes you just want your nails to look festive, a little eerie, and genuinely cool without booking a salon appointment two weeks in advance.
The good news? You do not need to be a nail technician to pull off a stunning Halloween manicure. With the right base colors, a toothpick, and maybe one thin art brush, you can create designs that actually look intentional. This guide covers everything from the easiest beginner designs to slightly elevated looks, plus the tools you need, step-by-step guidance, and tips that most articles skip over.
Why Simple Halloween Nails Are Actually the Smarter Choice
There is a reason the most liked Halloween nail posts on social media are rarely the most complicated ones. Overly detailed designs chip fast, take forever to dry, and are nearly impossible to replicate at home without professional tools.
Simple Halloween nails, on the other hand, hold up better. A clean black base with a single ghost on the accent nail? That stays intact through a whole Halloween party. A bloody French tip? Five minutes to paint, and it looks like you planned your entire costume around it.
Simple does not mean boring. It means smart.
Tools You Actually Need (No Fancy Equipment Required)
Before you start painting, gather these basics. You probably already own most of them.
The essentials:
- A base coat (this is non-negotiable, skip it and your polish lifts in a day)
- Black, white, and orange nail polish
- A thin detail brush or nail art brush (the ones that come in multi-packs on Amazon work fine)
- A toothpick or dotting tool
- A top coat for sealing everything in
Nice to have:
- Nail tape or striping tape for clean lines
- A makeup sponge for gradient effects
- OPI’s Nail Art Striper in black for freehand work
- A small cup of acetone and a cotton bud for cleanup
That is genuinely all you need for most simple Halloween nails. Anyone telling you that you need a UV lamp, gel polish, and a professional brush set to do a ghost nail is overcomplicating it.
Prep Your Nails First (This Step Makes or Breaks Everything)
Most people skip nail prep and then wonder why their polish bubbles or peels. Spend five minutes here and your simple Halloween nails will last twice as long.
Step 1: File and shape your nails to your preferred length. Short and rounded works beautifully for Halloween designs because the shapes are easier to draw on a compact canvas.
Step 2: Buff the surface lightly. This removes shine and helps polish grip the nail.
Step 3: Wipe each nail with a cotton pad soaked in acetone or rubbing alcohol. This removes oils, lotions, and anything else that causes polish to lift.
Step 4: Apply a thin base coat and let it dry completely before adding any color.
Do not rush this. Painting over a still-tacky base coat is how designs smear.
10 Simple Halloween Nail Designs You Can Actually Do at Home
1. Classic Black with a Ghost Accent Nail
This is the easiest Halloween look and it still photographs beautifully. Paint all nails black and leave one accent nail white. On the white nail, use a toothpick dipped in black polish to draw two small dots for eyes and a tiny curved mouth. That is a ghost.
To make it cuter, add a tiny black dot on each black nail as a star effect. Takes under ten minutes total.
2. Spider Web French Tips
Paint a nude or clear base coat on all nails. Once dry, use black striping polish or a thin brush to draw a curved tip on each nail like a French manicure, but in black. Then from the corner of the tip, draw two or three curved lines fanning outward. Add tiny horizontal connecting lines between them. You now have a spider web French tip, and it looks genuinely impressive.
3. Bloody Red Drip Tips
Start with a clean red or deep burgundy base. Once dry, use a thin brush loaded with dark red or black polish and create small drip shapes along the top of the nail, letting them trail downward like drips. It looks graphic and dramatic without requiring much skill.
This design works exceptionally well on short simple Halloween nails because the drips stay proportional and do not look overwhelming.
4. Orange and Black Color Block
Paint alternating nails orange and black. Done. No art required. This is the perfect option for when you want simple Halloween nails but have genuinely zero time. It reads festive immediately and the contrast is striking.
If you want to add one extra detail, use a toothpick to draw a tiny Jack-o-lantern face on one orange nail using black polish.
5. Pumpkin Accent Nail on Nude Base
Paint most nails a warm nude or cream. On one or two nails, paint the full nail orange. Once the orange dries, use a black toothpick to draw two triangle eyes, a triangle nose, and a jagged mouth. Finish with a tiny green line at the base of the nail to mimic a pumpkin stem.
This looks clean and polished, exactly the kind of simple Halloween nail design that works at the office AND a costume party.
6. Black Cat Eye Nails
Use a deep purple or black cat eye gel or magnetic polish. Swipe a magnet over the wet polish to pull the shimmer into a vertical line down the center of the nail. The effect looks like a glowing cat eye and it is one of the most on-trend simple Halloween nail ideas right now.
Sally Hansen and Beetle Gel both make affordable magnetic polishes that work well for this.
7. Mummy Nails
Start with a beige or cream base. Once dry, use white polish or a white art brush to draw irregular horizontal strips across the nail, leaving small gaps. These are the “bandages.” Add two small black dots peeking out between the strips for eyes on one accent nail. Instantly recognizable, surprisingly easy to execute.
8. Bat Silhouette Nails
Paint nails a deep purple, midnight blue, or black. On a lighter accent nail (try gray or lilac), use a toothpick dipped in black polish to draw a tiny bat shape. A bat is just a small body with two rounded wings on either side. Draw the wings first, connect them at a small center body, add two tiny pointed ears at the top. That is it. Simple Halloween nails do not get more iconic than this.
9. Cobweb Corner Design
Keep nails black or deep wine. In one corner of each nail, use a white striper or toothpick to draw a small quarter circle. Then draw two or three lines radiating outward from the corner. Add tiny curved connecting lines between the radiating spokes. This creates a cobweb in the corner of the nail and it looks intentionally minimal, which is very much a trend right now.
10. Galaxy Halloween Nails
Sponge on black, purple, and deep blue polish using a torn makeup sponge to create a gradient effect. Add tiny white dots with a toothpick for stars. This one feels more abstract than traditionally spooky, but it photographs beautifully and works perfectly as a subtle take on simple Halloween nails for people who want the vibe without the overt iconography.
Color Combinations That Work Every Time
You do not always need to plan an intricate design. Sometimes picking the right color combination is enough to create a Halloween feel. These combos work reliably well.
Classic: Black and orange, the original Halloween palette. Never goes wrong.
Elevated: Deep burgundy and gold. Rich, moody, and slightly gothic.
Cute: Lilac and black. Perfect for people who want Halloween nails that still feel feminine.
Minimal: Matte black only. One coat, a matte top coat, and you are done. Somehow looks incredibly intentional.
Trending: Emerald green with black details. This combination dominated Halloween nails in 2024 and is continuing strong. It leans more “witch aesthetic” than “classic Halloween” and it is genuinely striking.
How to Make Simple Halloween Nails Last Longer
Simple Halloween nails can chip quickly if you do not seal them properly. A few tricks that actually help.
Always cap the free edge of your nail when applying both base and top coats. This means swiping the brush along the very tip of the nail horizontally. It seals the edge and prevents chipping from the top down.
Apply your top coat in thin layers. One thick layer dries slowly and stays tacky longer. Two thin layers dry faster and seal better.
Reapply top coat every two days. It refreshes the shine and extends the manicure significantly.
Avoid submerging your hands in water immediately after painting. Wait at least an hour before washing dishes or taking a long shower.
Common Mistakes Beginners Make with Halloween Nail Art
Painting designs on wet base color. Always wait for each layer to fully dry before adding the next. Impatience is the number one reason nail art smears.
Using too much polish on the brush. Load the brush lightly and build the design in thin strokes. A heavy brush creates blobs, not clean lines.
Skipping top coat. A top coat is not optional if you want your simple Halloween nails to survive past day two. Seche Vite and HK Girl are both excellent fast-drying options.
Trying to fix wet mistakes. If a line goes wrong, wait for it to dry completely, then correct it with a fine brush dipped in acetone. Trying to fix wet polish just spreads the mistake.
Short Nails vs Long Nails: What Designs Work Best
Short nails are not a limitation for simple Halloween nails. In fact, some of the most popular designs look better on shorter nails because the proportions stay clean.
For short nails, stick to single-element designs. A ghost on one nail, a spider web on another, and solid black or orange on the rest. Overcrowding a small nail makes designs look messy rather than detailed.
For longer nails, you have more surface area to work with. Designs like full pumpkin faces, longer drip effects, and more elaborate cobwebs translate well onto longer nail beds.
Almond and coffin shapes work well for Halloween because they naturally read as dramatic even with minimal design.
Press-On Halloween Nails: A Genuinely Good Alternative
If freehand painting is not your thing, press-on nails have genuinely improved. Brands like Static Nails, Kiss, and imPRESS make Halloween sets that look like salon work, apply in minutes, and last up to two weeks with proper prep.
The trick with press-ons is nail prep. Clean nails, no oils, size them correctly, and press firmly for 30 seconds each. They will outlast a bad DIY polish job every single time.
For simple Halloween nails that need zero artistic skill, a quality press-on set is a completely valid option.
FAQs
1. What are the easiest simple Halloween nails for beginners?
Ghost accent nails, color block orange and black, and bloody French tips are the most beginner-friendly options. They require minimal tools and look great with basic nail polish.
2. What colors do I need for simple Halloween nails?
Black, white, and orange cover most designs. Adding deep red, purple, and a nude shade gives you enough to create almost any Halloween nail look.
3. How long do simple Halloween nails last?
With proper prep and a good top coat, they last five to ten days. Reapplying top coat every two days extends the life significantly.
4. Can I do simple Halloween nails on short nails?
Absolutely. Short nails actually suit Halloween designs well. Stick to one or two design elements per nail and let solid colors do the heavy lifting on the rest.
5. Do I need special tools for Halloween nail art?
Not really. A toothpick and a thin brush handle most designs. A dotting tool is helpful but optional.
6. What is the best top coat for Halloween nail art?
Seche Vite and HK Girl Top Coat are both fast-drying and seal designs cleanly without smearing them. Sally Hansen Insta-Dri is a budget option that works well.
7. Can I do simple Halloween nails without nail art brushes?
Yes. Toothpicks work for dots and small lines. Bobby pins make perfect dotting tools. A fan brush dragged through wet polish creates interesting textures.
8. Are press-on nails good for Halloween?
Yes, especially for people who struggle with freehand designs. Brands like Kiss and imPRESS offer Halloween sets that look professional and apply in under ten minutes.
9. What simple Halloween nail designs work for the office?
Muted cobweb designs, subtle cat eye nails, and pumpkin accent nails on a nude base all read as festive without being overly theatrical for a workplace setting.
10. How do I remove Halloween nail art without ruining my nails?
Soak a cotton pad in acetone, press it firmly on the nail for 30 to 60 seconds, then wipe away. Avoid scraping or peeling, which damages the nail surface.