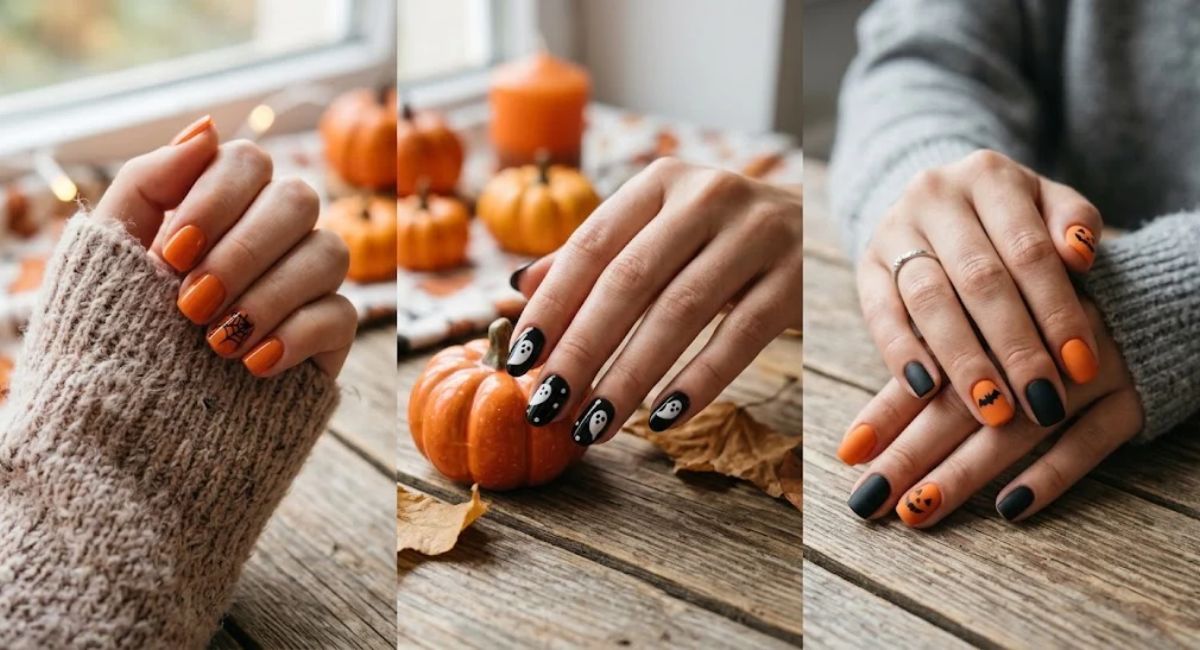
Simple Halloween nail designs are having a serious moment, and honestly, it makes total sense. Not everyone wants to spend three hours hunched over a nail art brush trying to paint a full haunted mansion scene on their pinky finger. Most people just want nails that look festive, cute, and a little spooky without the stress of getting it perfect.
Whether you are doing your nails at home or bringing inspiration to your nail tech, this guide walks you through the best simple Halloween nail designs, how to actually do them, what tools you need, and the small tricks that make a huge difference in how the final look turns out.
Why Simple Halloween Nail Designs Are Actually the Smarter Choice
Here is something most nail content does not tell you: overly detailed Halloween nail art looks great in photos but rarely holds up in real life. Tiny skulls become blobs. Detailed spiderwebs chip unevenly. And if you are doing them yourself, frustration sets in fast.
Simple Halloween nail designs, on the other hand, look intentional. A clean black French tip or a glossy orange base with one ghost accent nail reads as chic, not lazy. It is the difference between “I tried too hard” and “I know exactly what I am doing.”
Plus, simpler designs dry faster, chip less, and are far easier to touch up.
Tools You Actually Need (And What You Can Skip)
Before jumping into the designs, let us talk supplies. You do not need a massive kit.
Must-haves:
- Base coat and top coat (this alone improves every design)
- Black, white, and orange nail polish
- A thin nail art brush or a toothpick
- Nail polish remover and a small brush for cleanup
Nice to have:
- Nail dotting tool (for dots, eyes, and pumpkin faces)
- Stamping plates for spider webs
- Nail stickers or decals for zero-effort accents
Skip for now:
- 3D gel extensions (not beginner-friendly)
- Acrylic powder designs
- UV lamps (unless you are using gel polish)
Apps like Pinterest and Instagram are genuinely useful for saving reference photos before you sit down to do your nails. It helps to have a visual in front of you rather than trying to remember a design from memory.
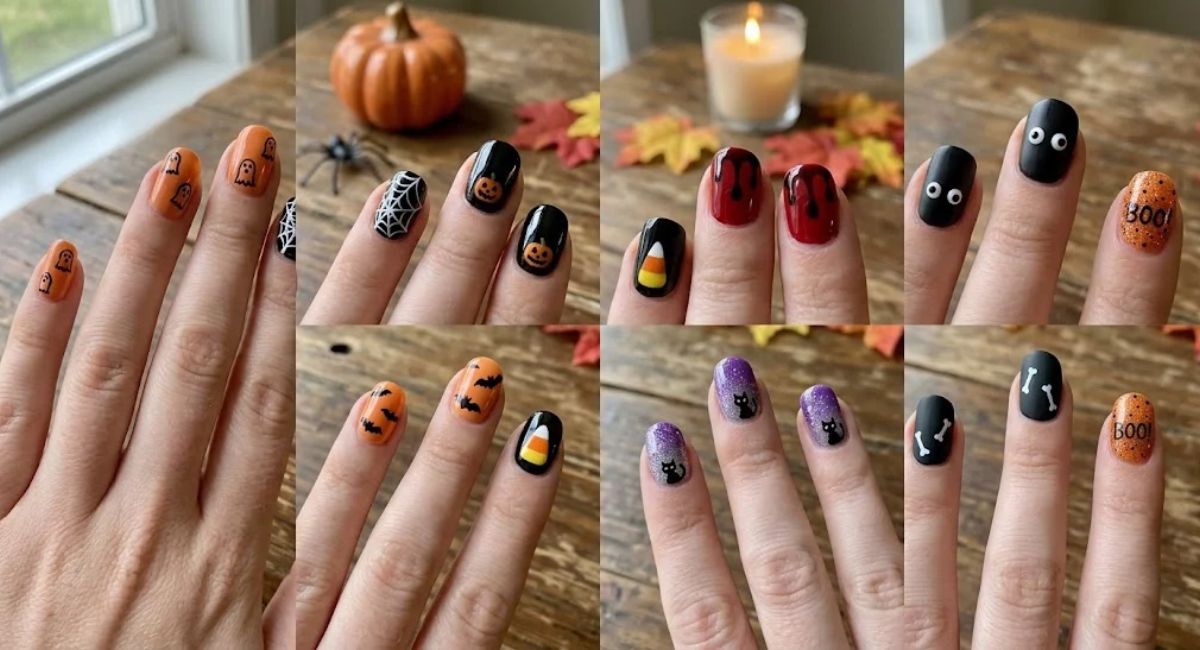
10 Simple Halloween Nail Designs You Can Actually Pull Off
1. Classic Black Nails With a Shimmer Finish
This is the most underrated simple Halloween nail design. A solid black base looks mysterious and season-appropriate, but adding a shimmer topcoat or chrome powder over it elevates the look completely.
How to do it: Apply two coats of matte black polish. Once dry, brush on a silver or holographic topcoat and seal with a glossy topcoat. That is it. The result looks like something you paid for at a salon.
2. Black French Tips
Black French tips are a stunning combination of edgy and sophisticated. This trend works perfectly for those who love a gothic vibe but want something polished enough to wear beyond Halloween.
How to do it: Apply a nude or sheer pink base. Once dry, use a black nail polish and a thin brush or French tip guides to paint the tips. Seal with a glossy topcoat. You can also use black press-on French tips for a quicker version.
3. Ghost Accent Nail
This is one of the most popular simple Halloween nail designs because it requires almost zero nail art skill.
Paint all nails white or a soft nude. On one or two accent nails, use a toothpick dipped in black polish to draw two small dots for eyes and a tiny “O” for the mouth. That is your ghost. It sounds almost too easy, but the result is genuinely adorable.
Short nails work especially well with ghost designs. A simple black and white ghost design on short nails is certain to put a spell on you and get all the likes this season.
4. Pumpkin Nails
Pumpkin nails are one of the best Halloween combinations. Start with a nude pink base coat on the tips, then paint the tips with glittery orange nail polish. If glittery orange is not available, use regular orange and add a transparent glitter topcoat over it. Then use a fine brush to add curved vertical black lines over the orange, giving it a pumpkin look.
You can keep most nails plain black or nude and use pumpkin nails on just the ring finger for a more modern, less overpowering look.
5. Spider Web Nails
Spider web nails look impressive but are actually one of the more forgiving simple Halloween nail designs because imperfect lines read as cobwebs anyway.
How to do it: Start with a white or light grey base. Using a thin brush or toothpick and black polish, draw a small dot in one corner of the nail. Draw lines outward like sunrays from that dot. Then connect those lines with small curved arches going from line to line. You do not have to be precise. The messier it looks, the more realistic the web effect.
6. Bloody French Tips
This simple red and bloody French tip design is easy enough to do at home. Create a dripping effect at the edges to mimic blood for a horror movie effect.
Start with a clean nude base. Use red polish and a thin brush to paint the tips, then add downward drips of varying lengths. Some nails can have one long drip, others two short ones. The uneven look is the whole point. Seal with a glossy topcoat to make it look fresh and wet.
7. Orange and Black Color Block
Color block nails require zero art skills. Paint alternating nails orange and black. You can add a matte topcoat to the black nails and a glossy one to the orange nails for a subtle contrast that makes the whole manicure feel more designed.
This is one of those simple Halloween nail designs that photographs incredibly well without taking any real effort.
8. Minimalist Bat Nails
Bats are one of the most beginner-friendly shapes to draw on nails because the silhouette is forgiving.
Apply a deep purple or black base. Using a toothpick or thin brush and black or white polish, draw a small bat silhouette on one accent nail. The body is a small oval. The wings are two curved triangles on either side. Two tiny dots for ears on top finish the look. That is a bat. Simple Halloween nail designs do not get much easier than this.
9. Candy Corn Nails
These are perfect if you want something Halloween-themed but not spooky.
Paint the base of the nail white. Add a band of orange in the middle. Paint the tip yellow. Use a thin brush to neaten the lines if needed. Seal with a glossy topcoat. The result is immediately recognizable and colorful, great for people who prefer cute over creepy.
10. Purple Cat Eye Nails
A deep purple cat-eye is a great option if you want to keep it simple while still making a statement.
Cat eye nail polish already has the magnetic effect built in. Apply the deep purple gel polish, hold a magnet strip over the wet nail for about ten seconds, then cure under a UV lamp. The light-shifting effect looks expensive and complex but takes almost no effort.
The One Mistake Most People Make With Halloween Nail Designs
Skipping the base coat. It sounds like a minor step, but it is the difference between a manicure that lasts four days and one that lasts ten. Dark Halloween polishes, especially blacks and deep purples, stain nails badly without a base coat underneath.
Apply one thin layer, let it dry fully, then start your design. At the end, always seal with a quality topcoat. The Seche Vite Fast Dry Topcoat is a consistently recommended option for home manicures because it cuts dry time significantly and adds a strong protective layer.
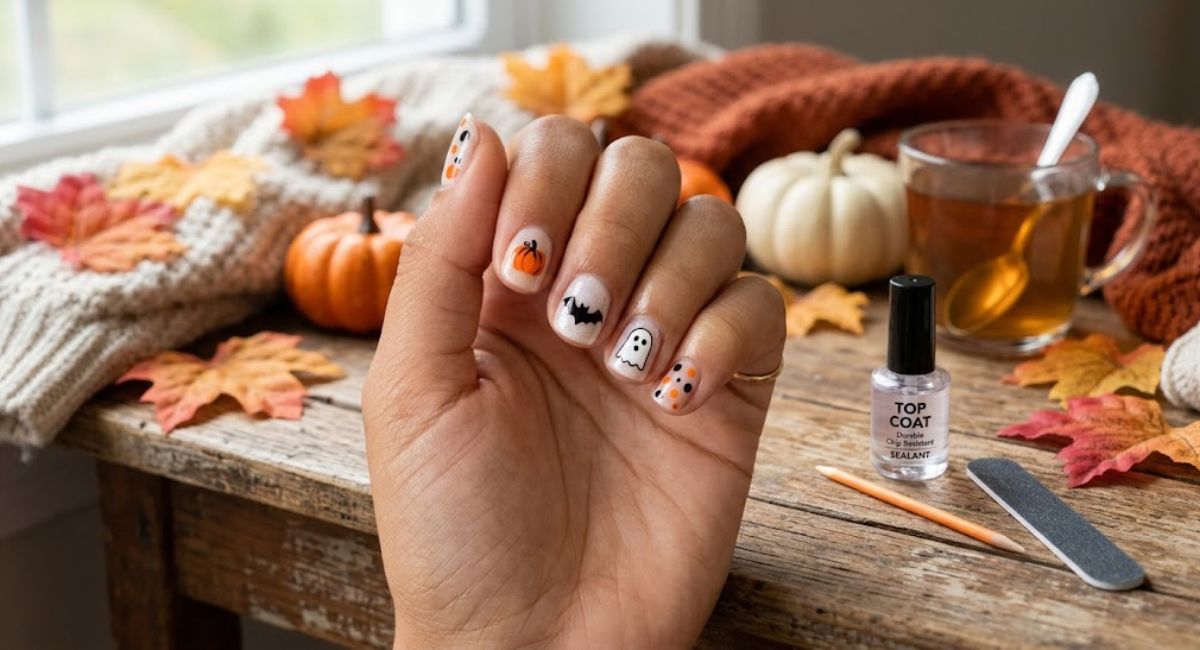
How to Make Simple Halloween Nail Designs Last Longer
A few habits that make a real difference:
Apply thin coats rather than one thick coat. Thick polish takes forever to dry and bubbles more easily.
Let each layer dry completely before adding the next. Even five extra minutes of patience prevents smudging.
Cap the free edge. That means running your brush along the very tip of your nail when applying polish and topcoat. This seals the edge and prevents peeling.
Avoid hot water for the first few hours after doing your nails. Showers and dishes are the top reasons a fresh manicure starts lifting early.
Simple Halloween Nail Designs for Short Nails
Short nails often get overlooked in nail art content, but simple Halloween nail designs actually look cleaner and more intentional on shorter lengths.
The best options for short nails include single-color designs with one accent nail, minimal dotwork (dots require no brush control), ghost or bat accent nails, and black French tips. Avoid overly detailed art on short nails because there is not enough surface area and the design becomes unreadable.
Press-On Nails as a Shortcut Worth Considering
Press-on nails have genuinely improved over the last few years. Brands like imPRESS, Kiss, and Static Nails now carry Halloween-specific sets with simple Halloween nail designs already done for you. Ghost sets, spider web sets, and orange glitter sets are widely available and can be applied in under ten minutes.
If you are short on time or nervous about doing nail art yourself, press-ons are a completely valid option and not the compromise they used to be.
Mixing and Matching: The “One Spooky, Four Neutral” Rule
A trend that has been growing is using simple Halloween nail designs on just one or two accent nails while keeping the rest neutral. This works especially well for people who find a full Halloween set too costume-like for everyday wear.
For example: four nails in glossy black, one accent nail with a small orange pumpkin. Or four nails in sheer nude, one accent nail with a ghost. The spooky element is there without being overwhelming.
Color Combinations That Work Every Time
Not all Halloween color combinations are equal. These ones consistently look good:
Black and white. Timeless, high contrast, works for any skill level.
Orange and black. The classic Halloween pairing. Hard to mess up.
Deep purple and gold. A witchy combination that feels luxurious rather than costumey.
Red and black. Dramatic and versatile. Works for vampire-inspired looks.
Black and silver. Edgier and more modern than traditional orange and black.
Final Thoughts
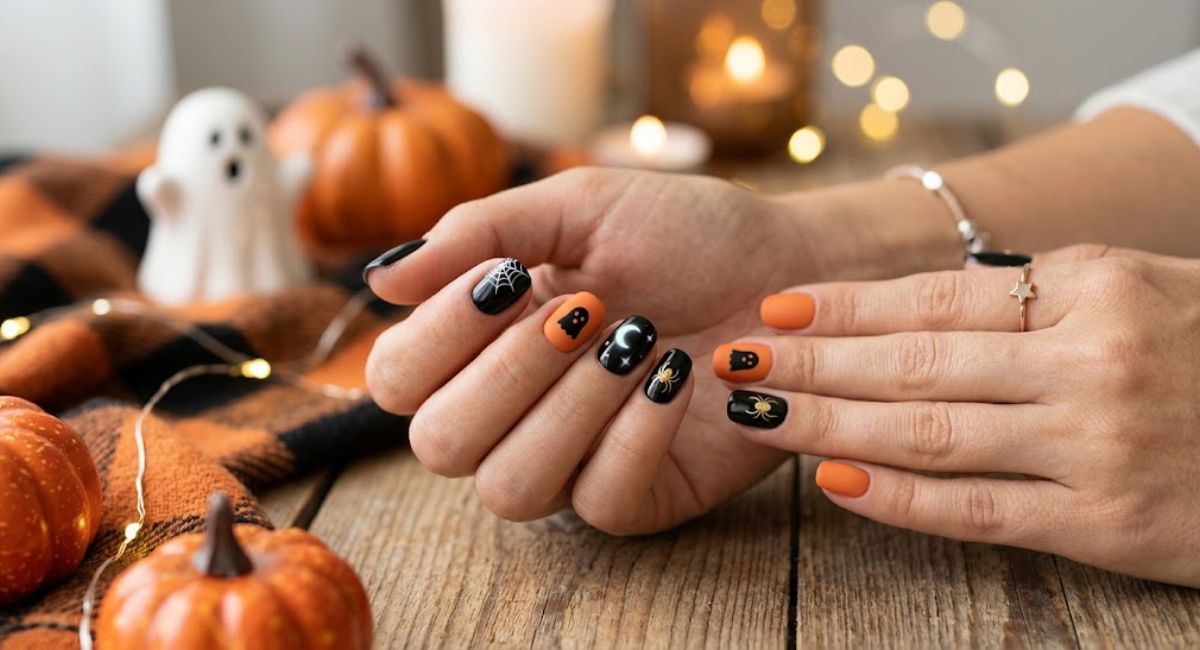
Simple Halloween nail designs are not a backup plan for people who cannot do elaborate nail art. They are often the better choice. Clean designs with intentional color choices and good execution will always outperform rushed complex art.
Start with what feels manageable: a black base, one ghost accent nail, a glossy topcoat. From there you can build up to spider webs, pumpkins, or bloody tips once you get comfortable with the tools and the process.
The best simple Halloween nail design is the one you can actually finish without wanting to wipe it all off halfway through.
Frequently Asked Questions
1. What are the easiest Halloween nail designs for beginners?
Black French tips, ghost accent nails, and candy corn nails are the easiest options. They require minimal tools and no advanced brush skills.
2. How do I make Halloween nail designs last longer?
Always use a base coat, apply thin layers, let each coat dry completely, cap the free edge with topcoat, and avoid hot water for a few hours after application.
3. Can I do simple Halloween nail designs on short nails?
Absolutely. Minimalist designs like dots, single-color nails with one accent, and black French tips look especially clean on short nails.
4. What nail polish colors do I need for Halloween nails?
Black, white, orange, and red cover most simple Halloween nail designs. A deep purple or dark grey is also useful for witch or bat-themed looks.
5. How do I draw a spider web on my nails?
Start with a light base. Draw lines radiating from one corner. Connect them with small curved arches. The imperfections actually enhance the cobweb look.
6. Are press-on nails good for Halloween?
Yes. Press-on nail brands now carry Halloween-specific sets that look great and apply in minutes. They are a solid option if you are short on time.
7. What is the cat-eye nail design for Halloween?
Cat-eye nails use a special magnetic gel polish that creates a light-shifting stripe effect. Deep purple cat-eye polish is a popular simple Halloween nail design choice.
8. How do I do ghost nails at home?
Paint nails white or nude. Use a toothpick and black polish to draw two dots for eyes and an oval for the mouth on accent nails. Seal with a topcoat.
9. Can I mix Halloween nail designs on different fingers?
Yes. The “one spooky accent, four neutral” approach is a popular modern technique. It keeps the look wearable and avoids feeling too costume-like.
10. What topcoat is best for Halloween nail designs?
Seche Vite Fast Dry Topcoat is widely recommended for home manicures. It speeds up drying time and adds a strong protective layer over your design.