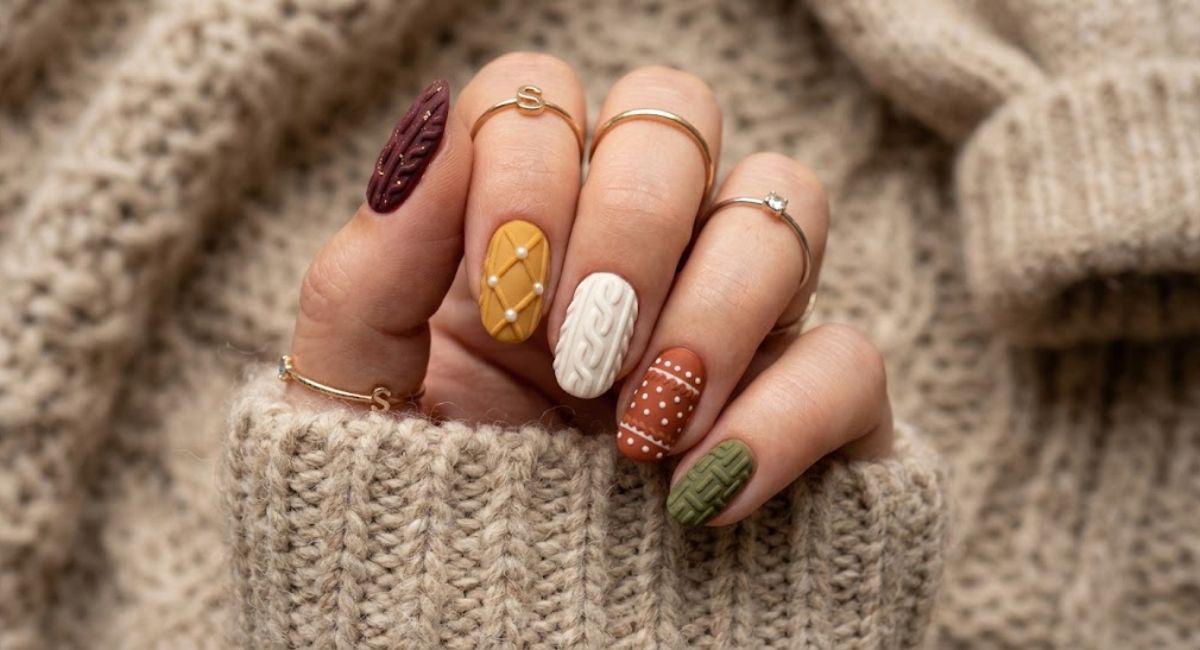
Sweater nails designs have taken the nail art world by storm, and honestly, it is easy to see why. That soft, knitted texture on your fingertips feels like autumn in a bottle. Whether you are curling up with a hot drink or heading out for a winter brunch, sweater nails add that extra layer of coziness to your look.
This guide covers everything you need to know, from the basics to advanced patterns, tools, common mistakes, and design ideas that actually look good in real life
What Are Sweater Nails Designs?
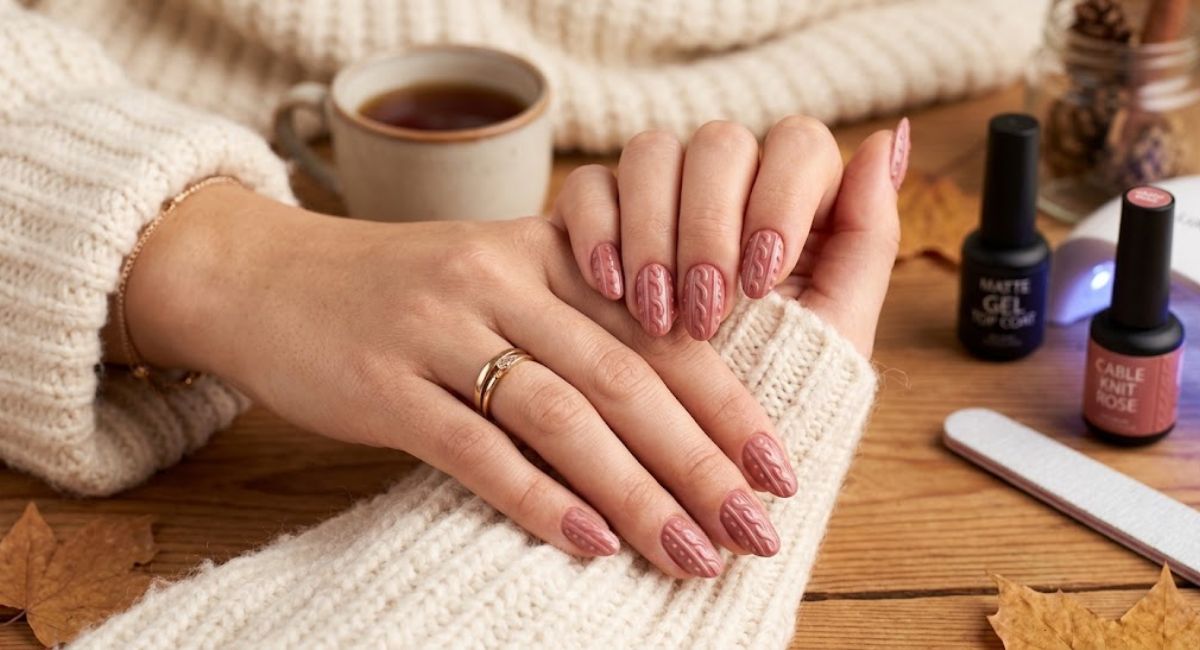
Sweater nails designs are a type of textured nail art that mimics the look of a cozy knitted sweater. The technique creates a raised, fabric-like pattern on the nail surface using thick gel, acrylic, or special nail powders.
The result looks like tiny cables, ribbed knits, or woven fabric sitting right on your nail. It became hugely popular in the fall and winter seasons, and now it is a year-round trend because of how unique and eye-catching it looks.
What makes sweater nail art different from regular nail designs is the actual texture. You are not just painting a pattern. You are building a three-dimensional surface that you can almost feel.
Tools and Products You Actually Need
Before jumping into designs, getting the right tools makes a massive difference. Many beginners struggle because they use the wrong products.
For gel-based sweater nails:
- Builder gel or thick sculpting gel
- Fine nail brush or dotting tool
- UV or LED lamp
- Matte top coat (this is key for the sweater effect)
For acrylic sweater nails:
- Acrylic powder in your chosen color
- Acrylic liquid monomer
- Kolinsky brush for detail work
- Matte finish spray or top coat
For beginners at home:
- Textured nail powders (available on Amazon or in beauty supply stores)
- Regular nail polish in a thick formula
- A fine-tipped nail art brush
- Matte top coat
The matte top coat is not optional here. Sweater nails with a shiny finish lose that soft, fabric-like look. Matte is what sells the illusion.
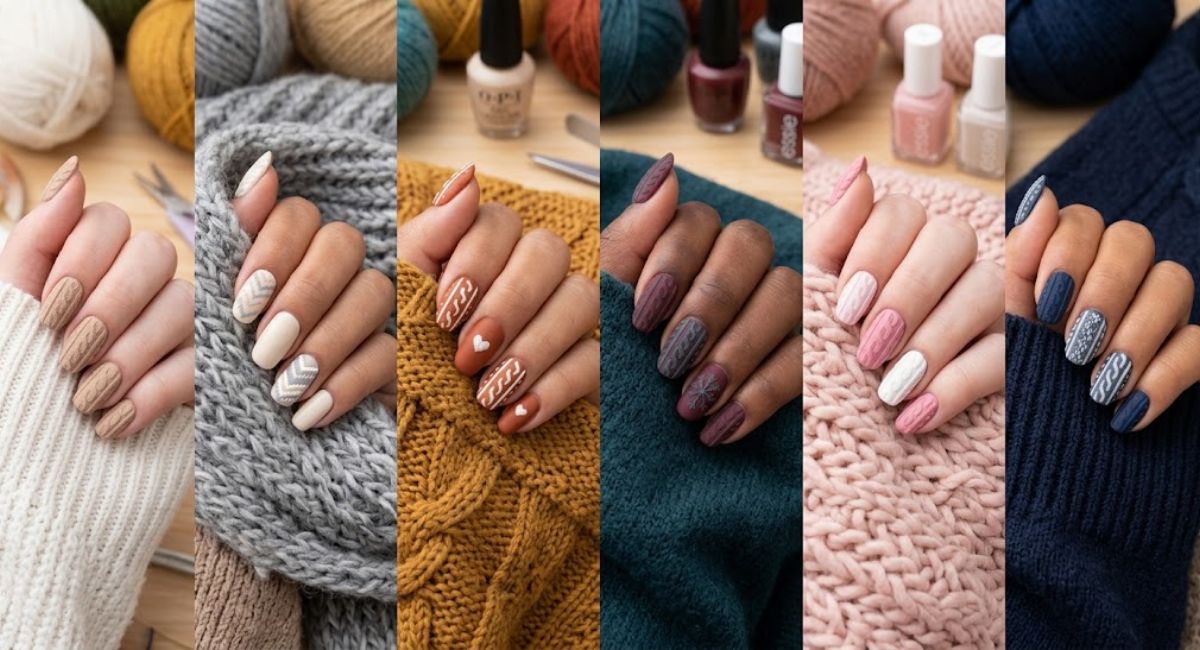
Popular Sweater Nails Designs to Try Right Now
1. Classic Cable Knit Sweater Nails
This is the original sweater nail design and still the most popular one. Cable knit patterns feature interlocking vertical lines that look exactly like the twisted cables on a chunky sweater.
To create cable knit sweater nails, use a thin brush to draw two parallel wavy lines down the center of the nail, then add small horizontal stitches crossing between them. Repeat this on both sides for a full cable effect.
Neutral colors like cream, oatmeal, camel, and off-white work best for this style. They look incredibly realistic and pair well with fall outfits.
2. Ribbed Knit Sweater Nail Designs
Ribbed knit is simpler than cable knit and works well for shorter nails. You create thin vertical lines running from the base to the tip of the nail, evenly spaced to mimic the ribbing on a tight-knit sweater.
This sweater nail design is beginner-friendly and looks polished even if your lines are not perfectly straight. Blush pink, dusty mauve, and sage green look stunning in this style.
3. Fair Isle Sweater Nails
Fair Isle is the colorful, patterned style you see on those classic Nordic sweaters. This sweater nails design involves repeating geometric shapes and small motifs across the nail in two or three colors.
Common motifs include small snowflakes, diamonds, zigzag lines, and dots. You do not need to be an artist. Nail stamps and stamping plates make this achievable at home.
Fair Isle sweater nails are perfect for the holiday season. Red, white, and forest green are the classic combination, but navy, cream, and burgundy look equally beautiful.
4. Chunky Knit Textured Nails
This style focuses on actual texture rather than painted patterns. You build up thick layers of gel or use nail fiber powder to create a genuinely bumpy, knitted surface.
Chunky knit sweater nails look best in neutral tones because the texture itself is the design. This works especially well on longer nails where the pattern has more space to show.
5. Herringbone Sweater Nail Design
Herringbone is a V-shaped weaving pattern that looks intricate but is actually made from simple diagonal lines. The design creates a woven fabric look that sits beautifully on almond or oval-shaped nails.
This sweater nail design suits deeper, richer colors. Chocolate brown, forest green, burnt sienna, and navy all work well.
6. Mixed Texture Sweater Nails
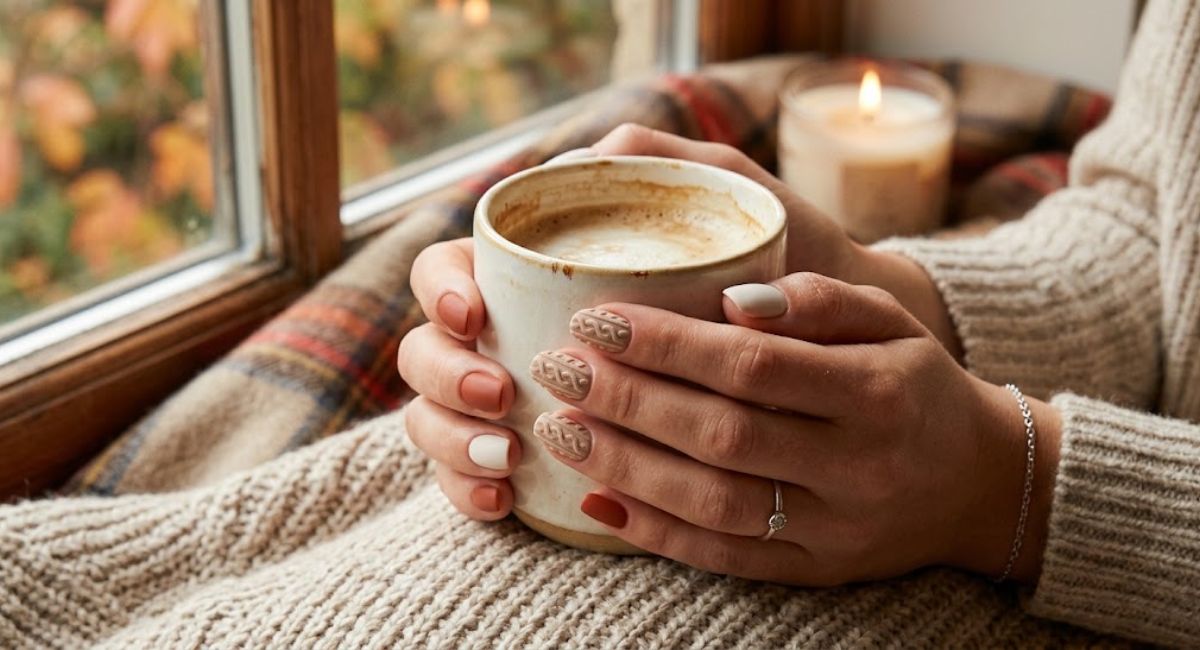
One of the trends competitors often miss is mixed texture sweater nails. This is where you combine two different knit patterns across your nails. For example, cable knit on your ring and index fingers, ribbed knit on the others, and a plain matte accent nail.
This approach gives you variety without the design looking mismatched. It also photographs beautifully for Instagram and Pinterest.
Step-by-Step Guide: How to Do Sweater Nails at Home
Many tutorials skip over the preparation phase, which is actually why most DIY sweater nail designs fail.
Step 1: Prep Your Nails Properly
Push back cuticles, buff the surface lightly, and wipe with a lint-free wipe and nail prep solution. Clean, oil-free nails help any product stick and last longer. Skipping this step is the number one reason sweater nails peel early.
Step 2: Apply a Base Coat
Use a clear base coat and let it dry fully. For gel, cure under your lamp for the recommended time.
Step 3: Apply Your Base Color
Apply two thin coats of your chosen color. For sweater nail designs, soft and muted shades work best because they let the texture or pattern be the star. Think dusty rose, warm taupe, deep teal, or classic cream.
Step 4: Create Your Pattern
For painted designs, use a thin detail brush. Keep paper towels and nail polish remover nearby for quick fixes. Work on one nail at a time so the polish does not dry before you finish the pattern.
For textured designs, apply your builder gel in small strokes following the knit direction. Cure between layers to build up height without spreading.
Step 5: Refine the Details
Once the base pattern is done, go back and clean up any uneven lines. Add a second layer of detail if the pattern needs more definition. This is where sweater nails designs start looking professional.
Step 6: Seal with Matte Top Coat
This is the most important step. Apply matte top coat in a thin, even layer. It instantly transforms the design into that soft, fabric-like finish that makes sweater nails so recognizable.
If you want a mix of textures, leave one accent nail glossy. The contrast between matte and shiny nails looks really intentional and stylish.
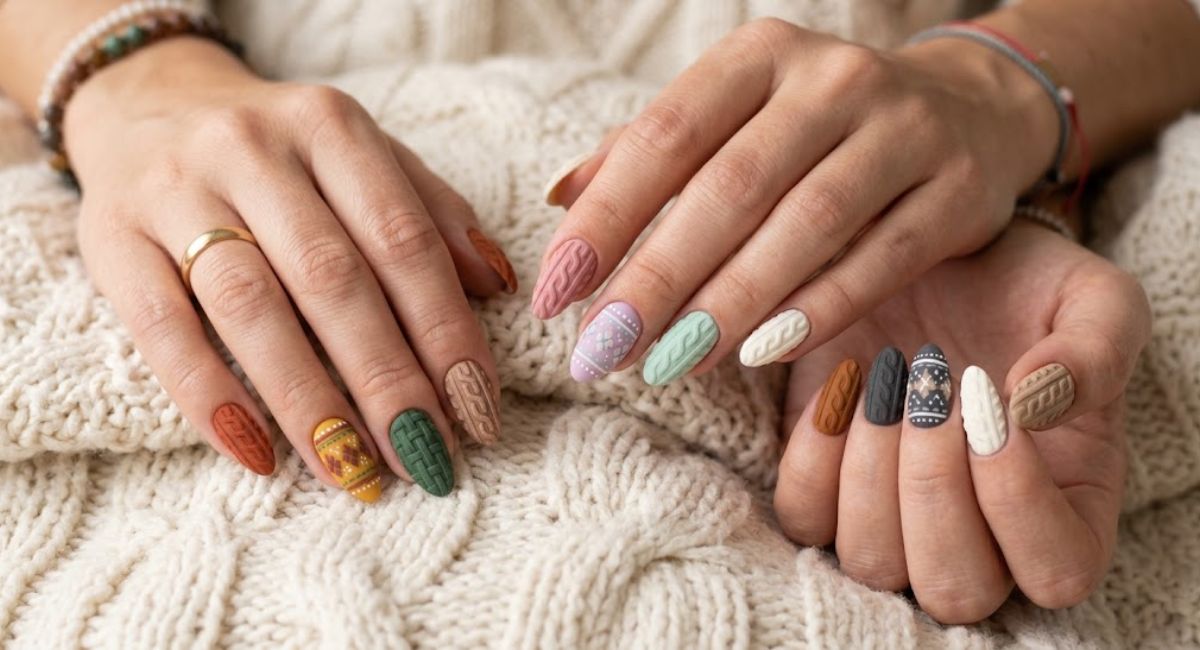
Color Palettes That Work Best for Sweater Nail Designs
Color choice makes or breaks sweater nail art. Here are palettes that actually work well together.
Autumn Warmth: Burnt orange, caramel, warm brown, and cream. This palette is perfect for September and October and works well with cable knit or Fair Isle patterns.
Winter Neutral: Oatmeal, ivory, sand, and soft gray. Classic and elegant. Works with any sweater nail design style.
Moody Holiday: Deep burgundy, forest green, gold, and cream. Perfect for the holiday season. Fair Isle designs in these colors always get compliments.
Cool Tones: Dusty blue, lavender, gray, and white. A more modern take on sweater nails that feels fresh and not overly seasonal.
Earthy Minimalist: Terracotta, sage, warm white, and olive. This palette works year-round and suits ribbed and herringbone sweater nail designs particularly well.
Common Mistakes to Avoid
These are the mistakes that make sweater nails look amateurish, and they are all fixable.
Using polish that is too thin. Thin polish does not hold fine detail. Use a thicker formula or gel for any textured sweater nail design.
Skipping matte top coat. Already mentioned, but worth repeating. A glossy finish on sweater nails makes the entire design look wrong. Matte is non-negotiable.
Overloading the brush. Too much product on the brush causes lines to bleed into each other. Wipe excess product off before each stroke.
Rushing between layers. Impatience is what causes smearing. Let each layer dry or cure completely before adding more detail.
Using too many colors at once. Beginners often think more colors equal better results. For sweater nail art, restraint works better. Two to three colors maximum per design.
Sweater Nails at the Salon vs. at Home
Getting sweater nails done at a salon gives you access to professional sculpting gel and experienced technicians. The result is usually more durable and more detailed. Expect to pay anywhere from 50 to 100 dollars depending on complexity and location.
At home, you can achieve beautiful sweater nails designs with practice, especially if you invest in good quality tools and products. Brands like Beetles Gel, Modelones, and Apres Gel are popular in the nail art community for home use.
Nail stamping kits are a game changer for Fair Isle and geometric sweater nail patterns at home. Moyou London, Born Pretty, and Bundle Monster all have stamping plates specifically designed for knit and fabric-like patterns.
How to Make Sweater Nails Last Longer
Even the most beautiful sweater nail design is disappointing if it chips after three days. Here is how to extend the wear.
Apply cuticle oil daily, but avoid applying it near the edges where the top coat meets the skin. Keep nails away from harsh chemicals by wearing gloves when cleaning. Reapply a thin layer of matte top coat every few days to refresh the finish and add protection.
For gel sweater nails, proper prep and sealing the free edge with top coat makes a significant difference in longevity.
Why Sweater Nails Designs Are More Than Just a Trend
What started as a seasonal trend has become a genuine nail art category. Sweater nails designs represent a shift toward nail art that feels cozy, personal, and texture-driven rather than just graphic or bold.
They photograph well, they suit multiple seasons when done in the right colors, and they are genuinely different from standard nail art. That combination keeps them relevant year after year.
Nail artists on platforms like Instagram, Pinterest, and TikTok continue to push the design forward, introducing new patterns and color combinations constantly. Searching “sweater nails” on Pinterest will give you hundreds of fresh ideas updated regularly.
Frequently Asked Questions
1. What are sweater nails designs? Sweater nails designs are textured or painted nail art that mimics the look of knitted fabric, including patterns like cable knit, ribbed knit, and Fair Isle.
2. How long do sweater nails last? Gel sweater nails typically last two to three weeks with proper prep and care. Regular polish versions may last around five to seven days.
3. Can I do sweater nails at home without a UV lamp? Yes. You can use regular nail polish and create painted sweater patterns without gel. Textured nail powders are also available that work with regular polish.
4. What top coat should I use for sweater nails? Always use a matte top coat. It creates the soft, fabric-like finish that makes sweater nail designs look realistic and cozy.
5. What nail shape is best for sweater nail art? Medium to long nails in almond, oval, or square shapes give sweater nails more surface area for detail. Short nails work best with simpler styles like ribbed knit.
6. Which colors work best for sweater nails? Warm neutrals like cream, camel, and oatmeal are classic choices. Earthy tones, muted pastels, and deep jewel tones also work beautifully depending on the season.
7. Are sweater nails only for winter? Not at all. Choosing lighter colors and fresh palettes like sage green or dusty blue makes sweater nail designs feel appropriate for spring and even summer.
8. What nail products create the best textured sweater nails? Builder gel or sculpting gel gives the most realistic texture. At home, fiber nail powders and thick gel polishes are great alternatives.
9. How do I remove sweater nails safely? Soak gel sweater nails in acetone using foil wraps for ten to fifteen minutes, then gently push off the softened product. Avoid forcing or peeling, which can damage the nail bed.
10. What is the difference between cable knit and ribbed knit sweater nails? Cable knit features twisted, interlocking vertical lines that look like chunky sweater cables. Ribbed knit uses simpler, straight parallel lines like the cuffs of a fitted sweater.